Creating a network is easy, but it isn't something that you will do very often. These steps will walk you through the entire process:
- Click on Profile in the left navigation pane.
- Click on Organization
- Select the Networks tab
- Click the blue + button
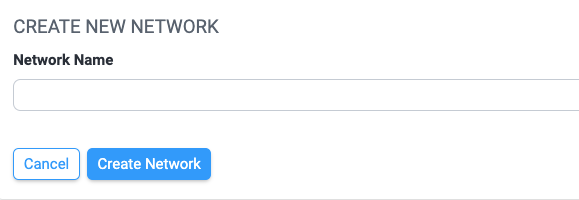
Give your network a name. All network members will see this name, so try to make it short but descriptive. After you have named your network, click Create Network.
You will see your new network near the top of the list of networks now, with the word Organizer next to its name.

Once you have created a network, the next step is to bring other accounts into your network. To do that, you need to distribute your unique access code to the administrators of those accounts.
To get the access code, click on the expanding caret that's on the far right of your network's name. On the next page, you will see the name of your network and the Network Access Code. Copy the code and give it to the administrators of the accounts that will join the network.
You can edit the network's name here if necessary, as well. If you do so, use the blue Save button to make your changes permanent.
